Vactrim Light Vactrim Light

How to Find the Ideal Mounting Height for Linear Lights

Time:2026-10-07 Author:Isabella
0%

Choosing the correct height for a linear light affects visibility, comfort, energy use, and maintenance access. The question is not simply, “what is the ideal mounting height for linear lights?” A reliable answer depends on the task plane, ceiling structure, beam angle, spacing, and surface reflectance.

The International Energy Agency’s Energy Efficiency 2023 report identifies lighting as a major electricity-use category worldwide. Efficient design therefore requires more than selecting high-output LED fixtures. The Illuminating Engineering Society recommends evaluating illuminance, uniformity, glare, and visual comfort together. For many office tasks, EN 12464-1 commonly uses 500 lux as a planning reference. Yet 500 lux alone cannot confirm a successful installation. A bright desk may still show harsh reflections on a monitor.

Consider a 2.7-meter office ceiling. A linear fixture mounted too close to the ceiling can create uneven pools of light. Lowering it may improve uniformity, but it can also increase glare and interfere with sprinklers, signage, or ventilation. In a retail aisle, the ideal position may shift toward the product face. In a warehouse, mounting height must also support safe lux levels across floor zones.

A useful starting point is to calculate the working-plane height, fixture spacing, and beam distribution together. Then confirm the result with photometric software or a physical test bay. Small changes matter. Reflective flooring can expose weak assumptions quickly.

This guide offers practical direction, not a universal formula. Real projects differ, and even experienced designers sometimes need to revise the first layout after measuring light on site.
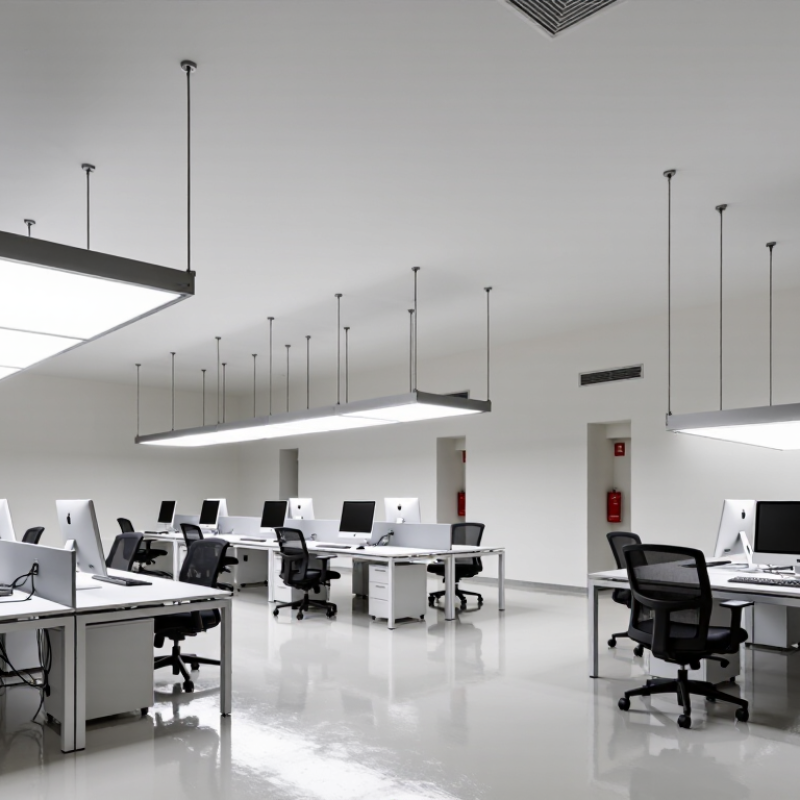
How to Find the Ideal Mounting Height for Linear Lights

Define the Purpose and Lighting Requirements of the Space

Before choosing a mounting height, define what the linear light must help people do. A reading desk, production bench, corridor, and display wall need different lighting conditions. EN 12464-1:2021 commonly uses 500 lux for office work, while circulation areas often require around 100 lux. These values are starting points, not automatic answers.

I usually measure the working plane first, then test the fixture at several heights. A lower installation can strengthen task illumination, but it may create bright reflections on screens or polished surfaces. A higher position spreads light more broadly and can improve uniformity, yet it may waste light above the useful area. The Illuminating Engineering Society links visual quality with illuminance, uniformity, glare control, and color rendering. Check all four. A 2022 International Energy Agency analysis also reported that lighting used about 15% of global electricity, so poor positioning has operational consequences.

The space’s purpose should guide the final decision. For a workstation, keep the light outside the user’s direct field of view. For a warehouse aisle, align the fixture with the task direction and check vertical visibility on labels. For a hospitality area, lower brightness may support comfort better than maximum lux. I have seen layouts pass a calculation and still feel harsh in person. Human observation matters. Test with real furniture, real screens, and occupied conditions. Measure again after installation.

Measure Ceiling Height and Identify the Installation Surface

How to Find the Ideal Mounting Height for Linear Lights

Measure the finished ceiling height from the floor, not from an unfinished slab. Use a laser measure when possible, then check the reading with a tape measure. Ceilings can vary slightly across one room. That small difference matters when several linear lights must appear perfectly aligned.

I once measured only the center of a ceiling and missed a lower section near a beam. The installation looked uneven. Measure at both ends of the proposed fixture and record the lowest point. Leave enough clearance for doors, cabinets, sprinklers, and air vents. A linear light above a workbench may need a different height than one above a dining table. Consider the light’s beam angle, glare, and the activities below it.

Identify the installation surface before selecting mounting hardware. Concrete ceilings usually need suitable anchors and careful drilling. Wood ceilings require attachment to joists or properly rated blocking. Suspended ceilings need support wires or independent framing; the ceiling panel alone may not carry the fixture safely. Drywall can look solid but may fail under concentrated weight. Check the fixture weight, mounting plate, cable route, and local electrical requirements. A qualified electrician should verify connections and protection. Do not assume the existing surface is strong enough. That assumption is easy to make, and expensive to correct.

Calculate the Ideal Mounting Height for Linear Lights

How to Find the Ideal Mounting Height for Linear Lights

Calculate the mounting height from the luminaire to the working plane, not to the floor. For a desk, the working plane is often about 0.8 metres above the floor. If the ceiling is 3.6 metres high, the mounting height is approximately 2.8 metres. This simple measurement gives you a useful starting point.

The next step requires lighting data. Use the target illuminance, room area, fixture output, coefficient of utilisation, and light loss factor. A basic lumen calculation is:

required lumens = illuminance × area ÷ (utilisation factor × maintenance factor)

However, this does not confirm uniformity. Check the fixture’s beam angle and recommended spacing-to-mounting-height ratio. For example, a narrow beam may need closer spacing, while a wide beam can cover more floor area.

Look at the room itself. Dark ceilings absorb light. Glossy desks can create reflections. A low mounting height may produce bright spots and uncomfortable glare. A higher position can improve distribution, but it may reduce useful illumination on the task. In practice, I would install one test section before completing a large project. Measure light at desk height, near walls, and between fixtures. Then adjust the height or spacing. The first calculation is rarely perfect. Human comfort, furniture changes, and real ceiling conditions can challenge the neat result on paper.

Adjust Height for Brightness, Glare, and Uniform Light Distribution

How to Find the Ideal Mounting Height for Linear Lights

Adjust Height for Brightness, Glare, and Uniform Light Distribution

Mounting height strongly affects brightness, glare, and coverage. A higher fixture spreads light widely, but the working surface receives less illumination. A lower fixture delivers stronger light, yet it may create harsh reflections on desks or polished floors. Measure light at the actual task height, not only at floor level. I usually check several points with a calibrated lux meter. Small differences can reveal uneven lighting.

Ceiling height, beam angle, fixture spacing, and surface colors all influence the result. Bright walls and ceilings reflect more light, while dark finishes absorb it. For offices, place linear lights high enough to keep the luminous surface outside direct eye level. In kitchens or workshops, align the fixture carefully with the work area. Otherwise, your body may cast shadows across the task.

Test before final installation. Hang one section temporarily, then inspect the room from seated and standing positions. Reduce glare with shielding, indirect placement, or controlled dimming. A common spacing rule may work on paper, but real rooms often disagree. I have seen a technically bright layout feel uncomfortable after ten minutes. That reaction matters. Recheck the spacing, surface reflections, and measured lux values before fixing every fixture permanently.

How to Find the Ideal Mounting Height for Linear Lights

Adjust height to balance brightness, glare, and uniform light distribution.

Relative workplane illuminance is calculated using the inverse-square relationship E ∝ 1/h², with 3.0 m normalized to 100% for the same light output. Lower mounting heights provide higher illuminance but can increase glare and hot spots. Higher mounting heights reduce brightness and may improve visual comfort and distribution; confirm the final height with a photometric layout, spacing review, and glare assessment.

Verify the Layout and Fine-Tune the Final Installation Position

Finding the ideal mounting height for linear lights is only half the job. The final position must support the actual layout, not just the drawing. Mark each proposed fixture location with tape before drilling. Then check sightlines from workstations, walkways, and seated areas.

I once approved a layout that looked balanced on paper but created glare near a polished countertop. A quick evening test exposed the problem. Move the light 100 millimeters, and the reflection softened noticeably. Use a temporary mount when possible. Measure the light level at desk height, not only beneath the fixture. Compare several points across the room. Uneven readings may reveal spacing problems or an incorrect mounting height.

Tips: Keep the first installation adjustable. Check door swings, shelving, ventilation, and maintenance access before fixing the brackets. Stand in the room at different times of day. Natural light can change the result. If the ceiling is uneven, record each mounting point separately. Do not force every fixture into one line. A small visual offset may produce better illumination. Leave room for correction. Final judgment should come from both measured performance and human comfort. The neatest drawing is not always the best installation.

FAQS

How should I choose a mounting height for a linear light?

Start with the space’s purpose. A reading desk, corridor, warehouse aisle, and display wall need different lighting. Measure the working surface, not only the floor. Test several heights before permanent installation.

What lighting levels can guide the initial design?

Office tasks often begin around 500 lux. Circulation areas may begin near 100 lux. These figures are starting points, not final answers. Furniture, finishes, and user comfort can change the result.

Does a higher fixture always provide better lighting?

No. A higher fixture spreads light more widely and may improve uniformity. However, the work surface receives less illumination. Some light may also land above useful areas.

What problems can occur when a linear light is mounted too low?

A low fixture can create strong task lighting. It may also cause screen reflections, polished-floor glare, or harsh brightness. Your body could cast shadows across the work area. The first layout may be wrong.

How can I reduce glare from linear lighting?

Keep the luminous surface outside direct eye level. Use shielding, indirect placement, or controlled dimming when needed. Inspect the room from seated and standing positions. Ten minutes of discomfort matters.

How do ceiling height and surfaces affect the result?

Ceiling height changes light spread and fixture spacing. Bright walls and ceilings reflect more light. Dark finishes absorb more light. A calculation may ignore this difference.

How should linear lights be positioned over work areas?

Align the fixture with the task direction. In kitchens and workshops, avoid placing it where your body blocks the work surface. For desks, keep it away from direct screen reflections. Check labels vertically in warehouse aisles.

What should I test before installing every fixture permanently?

Hang one light section temporarily. Use a calibrated lux meter at several task points. Test with real furniture, screens, and occupied conditions. Observe the space, then measure again. Human judgment is imperfect, but useful.

Conclusion

Finding the right height for linear lights begins with understanding the space’s purpose, target brightness, and visual priorities. Task-focused areas may need more concentrated illumination, while open spaces often benefit from soft, evenly distributed light. Start by measuring the ceiling height and identifying the installation surface, such as a ceiling, wall, beam, or suspended structure. These details determine the available mounting options and the light’s effective coverage.

To answer the question “what is the ideal mounting height for linear lights,” consider the fixture’s length, beam angle, lumen output, and the height of the work plane or key surfaces below. Mounting higher can improve uniformity and reduce harsh hotspots, while mounting lower may increase brightness but create glare or uneven shadows. Before final installation, review the layout from different viewing angles, check spacing between fixtures, and make small height adjustments to achieve balanced illumination, comfortable visibility, and a clean overall appearance.

Isabella

Isabella

Isabella is a dedicated marketing professional with a sharp focus on driving brand growth and engagement through strategic content creation. With an extensive background in digital marketing, she combines her passion for storytelling with her keen understanding of industry trends to deliver......